We've released our website feedback tool Notable to the public, which means now it's time to start iterating, iterating, iterating to keep polishing the app. Recently we rolled out a change to the screenshot annotation toolbar; easier to use, more functional, and much better looking. As a result our note overlays started to look a little anemic: they couldn't hold up next to the new toolbar. So, we decided to redesign the overlays as well.
The Notable overlays are not a huge project, but they were a cool little learning exercise and an interesting microcosm of our process and how we go about solving problems here at ZURB, so we decided to dissect the process, why we did what we did, and how we implemented it.
First Steps: Defining the Problem
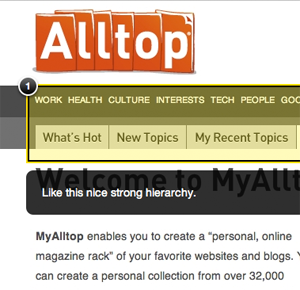 The original Notable visual note style
It wasn't just that the notes didn't look good enough (though they didn't) but they had some major usability problems. The visual notes overlay put a heavy yellow hue on the selected section which was great from a detection perspective and terrible from a visual feedback perspective. If you needed to call out that something was the wrong color, well...of course it was, it was yellow.
Defining a problem like this is how we solve everything here at ZURB. Without constraints how do you reach a solution? We could have just said 'we don't like these notes, so let's make cooler ones' but we could have gone down a hundred different paths instead of the 5 or so we ended up with. Defining the problem and the constraints on the solution keeps us focused and efficient.
So we knew what we wanted to fix in the current overlays, and what the new ones would need to do:
- Not obscure the visual design hue
- Clearly call attention to where the notes were on the page
- Be easily resized and have clear selection and focus states.
- Look awesome.
Framing the Solution
We had our marching orders, now it was time to make it happen. In most cases at ZURB we start with some quick sketching; it's low investment, quick and helps us clearly state our intentions and give each other feedback. With this little project we jumped into Photoshop to knock out some fast visual iterations. The problem was clearly defined and with such a small project the devil would be in the details.


These are three of the iterations we went through before we reached a final mockup. Once we've got the page element started we go through iterations quickly, grabbing a layer set and riffing on it again and again until we've built up a good sized set of options and refinements to make some decisions around. As with our clients our goal is to provide what we need to come to a decision and execute on it.
After some internal discussions (and a healthy bit of swapping the mockups around) we arrived at this final mockup:

Our final version met the criteria we set in the first phase:
- It doesn't obscure the visual hue like our old notes
- It clearly calls attention thanks to big, eye-popping orange borders
- They are easy to grab and resize thanks to larger hit areas and large resizing handles (twice as big, in fact)
- It looks awesome. We were pretty giddy about the glass effect. You've got to love the little things.
Fast Iteration to an Awesome Solution
This project only took a couple days, and that with a number of other projects and client work on our plate. We have to move fast at ZURB and this was no exception — in fact we've discovered that most times when you have to get something done in a short stretch you'll do a better job than if you can just noodle on it for days and days.

Coming Up Next...
In part 2 we'll look at how we implemented our visual mockup and some cool code tricks we learned in the process. You can see the implementation yourself by checking out this public Notable post!